Star Wars Celebration 2019 Recap – Part 2

Part 2 is here! I’ll hit on Day 1 of Star Wars Celebration – Chicago 2019.

Day 1 (Thursday)

Unlike prior Celebrations, Chicago had a “bonus” day for its first day.  There were no panels on Thursday, but it was a good day to explore the convention floor and meet up with peeps.

Before the Convention

The day started in my hotel room.  My roommate and his girlfriend were planning to drive up that day, so I was expecting them to arrive late that night.  For now, I was on my own!  The convention floor was opening around 1 PM, so I had some time to burn.  I walked to Dunkin Donuts nearby to get some coffee and ate my cereal with coffee.  I didn’t realize there was a psuedo Starbucks downstairs in the hotel at that time.  My short but brisk walk to Dunkin Donuts confirmed why Chicago is indeed the Windy City.  In between skyscrapers, the wind can get really crazy (known as the Venturi effect, you learned something today!)  It wasn’t too cold on Thursday, but it felt around 40F (4C).

Around 10 AM to 11 AM, the Celebration app was supposed to open up panel reservations for the panels held after the main morning panels.  Surprise! It didn’t!  The first of many blunders by the app unfortunately.  After sitting around for an hour trying to get into the panel reservations system and also the digital store (that one never worked), I decided it was time to pack up my bag and head out!  I had got in touch with the SWTOR Fan Community volunteers.  Swtorista (the hardest working woman in SWTOR per Ted, and 100% true) applied for a booth, got approved, and then organized everything at the SWTOR Fan Community booth.  We had a group chat in Twitter where we expressed our frustration with the app on Thursday morning, lol.  I had not committed to volunteering for specific times mainly because I didn’t have an Exhibitor badge and there were quite a few people already signed up.  However, I planned on chipping in where I could.  A few of the volunteers had already helped Swtorista set up the booth 🙂

SWTORBooth1

Swtorista, Fyonha, Zen, and Dekion (Left to Right)

Instead of taking a Lyft, I decided to walk to the convention center.  My hotel wasn’t special enough for a shuttle, lol, since it wasn’t an official Celebration hotel.  The walk was about 30 minutes, and I was able to drop by Jimmy John’s to pick up lunch.  I ran into a few curious people while walking towards the convention center.  A Rebel backpack?  Hmm?  I wonder where they are going!  I decided to ask the obvious question (“Are you here for the convention?”) and broke the ice with them.  They had scouted out where to go specifically, so I just followed them on the way to the McCormick Convention Center.  Before entering the center, we stopped at one of the nearby hotels for a quick rest.  During that time, one of the guys mentions the panel reservations system is working!!!  I hopped onto the app (still buggy) and managed to reserve spots on almost everything I wanted to attend (Resistance panel, Clone Wars streaming, Let’s Play, to name a few).  The panel reservations allowed you to skip the long line and go into an express queue.  Almost guarantees a decent spot and hassle free too (minus the app).

At the Convention

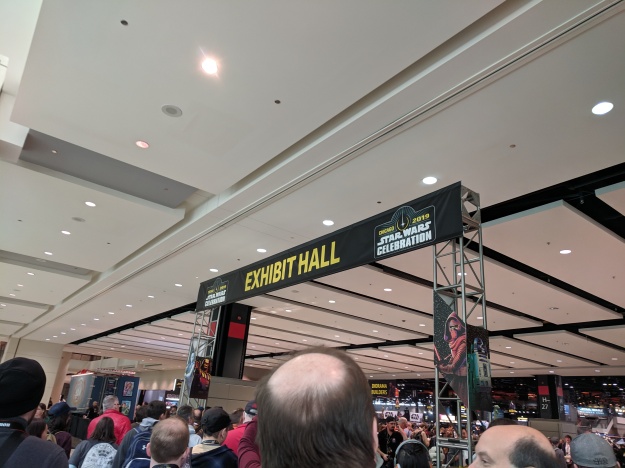
We made our way to the security checkpoint for the convention center.  Unlike Orlando, the staff were organized with a ton of lines for bag checks.  It went quick!  From there, it was a waiting game while everyone in the exhibit floor queue was slamming the free Wifi sponsored by Galaxy’s Edge.  1 PM came around and finally the line was moving!

My first stop was to the SWTOR Fan Community booth (#1344).  I believe the first people I saw were Fyonha and Dekion!  We met at Orlando for Celebration, and braved the concrete floor for the 40th anniversary panel overnight queue… Needless to say, that was a bonding experience, and I was so glad to see them here!  They live close to Chicago, so helped Swtorista out A LOT with the booth.  They are wonderful friends!  They are officers for the Ootini Guilds, and I have raided with them a few times a while back! After meeting up with both of them, Swtorista came by (recognized her from the datacron video) and gave me a hug and a swag bag!  I had expressed interest in volunteering prior to the convention, and she was sweet enough to make bags for anyone that was going to help out!  The booth was sort of hectic with the show floor opening up, but we talked briefly and then I met a few of the other volunteers.  Next up is Zen!   He was one of the main volunteers and had brought his Satele Shan lightsaber for the booth as a display prop.  The detail in the lightsaber is AMAZING!  Zen was gracious enough to let us handle the lightsaber.  Zen is a member of AIE – they are on the same server as me, Jedi Covenant!  So glad to have met him!  Next up is Kogass.  I had dropped by his Twitch channel randomly a few days before Celebration.  He’s definitely one of the more prominent SWTOR streamers and knows just about everyone in the Twitch SWTOR community.  He was instrumental in helping out with the livestreams from Celebration and is a pretty chill guy too.

Then, finally, after all these years, I met the one and only Jessie!  She had the hair buns, little too obvious to figure out who she was!  Along with Jessie was Mox and Wil.  I’ve known all 3 for quite a while from Unholy Alliance and their efforts hosting Extra Life events for SWTOR.  I had also participated in a few of their WOG (What’s an Ops Group) nights, best described as chaotic fun!  Wil and I teamed up together in Anthem a few times too.  I was getting a bit hungry at that point, and the booth was really crowded (didn’t need more people hanging around), so I decided to head to the food court and enjoy my Jimmy John’s sandwich.

One of the first places I wanted to visit after lunch was the Galaxy of Heroes booth (aka the EA booth).  Ironically, only Galaxy of Heroes had a presence on the floor.  No Battlefront or official SWTOR.  I’ve played Galaxy of Heroes since launch.  Wonderful mobile game that doesn’t take too much of your time but has enough complexity and challenge to draw you back in.  Not to mention, I can play it viably as a free player.  From my experience at Orlando, I knew that visiting them should net me some free crystals (microtransaction currency in the game).  After talking to their community guy and a developer, I got on the free crystals list AND got one of those phone pop things with the game’s logo on it.  Turns out, during Celebration, I got 1000 free crystals almost every day there!  That’s sort of crazy considering it amounts to more than $30 of free stuff.

I met up with Jessie, Mox, and Wil again at the Galaxy of Heroes booth, and we walked around the show floor for a bit before parting ways (Jessie had to get some Her Universe stuff).  I migrated back to the “home base” aka the SWTOR FC booth and learned how I could help out with the booth and how the prizes were being done.  Swtorista had created entry tickets with a tear off portion for physical giveaways at Celebration and a take home portion for the website giveaways later on.  The grand prize was a Studio version of the Collector’s Edition of the game.  Same box as a regular Collector’s Edition (I own one!) with a signed sleeve by the Bioware founders (Ray Muzyka and Greg Zeschuk).  The booth also had a PC loaded up with SWTOR.  It wasn’t working on Thursday since Bioware decided to drop an update literally that day or the night before and the Internet is not that great at Celebration.  The free swag at the booth were character buttons and cards.  My SWTOR FC and Swtorista swag is shown below.

SWTORBooth_SWAG

SWTOR and Swtorista SWAG!

SWTOR Fan Community Booth SWAG

  • 6x character buttons
    • Ven  Zallow
    • Shae Vizla
    • Tau Idair
    • Satele Shan
    • Jace Malcom
    • Darth Malgus
  • Character Postcards (2 sided)
  • Giveaway Ticket (code already used, don’t bother, lol)

Swtorista SWAG / Volunteer Only Items

  • Swtorista pin (based on her character) – I really want to do my own based on R2; little hard to see it, it is under Satele.
  • Volunteer / Fan Community Member Name Tags – I LOVE THIS!!!;  had it on the whole time at Celebration; very tempted to wear it at work 😛
  • SWTOR Fan Community Lanyard – Again, had it on the whole time
  • “Lightsaber crystals” – Imported from Ilum!  Swtorista didn’t reveal her source.  Smuggled??  Very sketchy.

After a little bit, I decided to head over to the Del Rey publishing booth to get my Lost Stars copy signed by Claudia Gray!  The line had already started early and it being the first day, was a little disorganized.  Jessie, Wil, and Mox eventually joined the line, but a little after me.  I talked to a few of the peeps near me for a bit and we all complained about the app LOL.  One of the ladies handed me a nice General Leia button.  After about an hour, finally got to meet Claudia Gray, probably one of my favorite new canon authors.  I mentioned I enjoyed her fan casting of her book characters as famous actors and actresses, and particularly enjoyed her casting of Priyanka Chopra as Greer Sonnel.  She had a few ideas for her newer characters too, but I don’t recall all of them.  I know Gemma Chan was one of her choices.

I made my way back to the SWTOR FC booth and wandered around the show floor for a bit as well, aimlessly for the most part.  The exhibit hall was closing at 8 PM on Thursday, and I intended to help close up the booth that day.

After the Convention

8 PM came along, and with all of the volunteers present, we were able to close up the booth fairly quickly, pack up the PC (Dekion was planning to get the SWTOR update at home, and secure everything else.  Mostly everyone was going their separate ways, but Kogass and Swtorista were interested in hanging out for dinner.  We left the convention around 8:30ish and took a Lyft to Giordano’s. I picked out the place based on reviews and the fact that we wanted to test out the famous deep dish pizza.  There was a 30 minute wait, but we were already there and didn’t want to go elsewhere at that point.  Swtorista mentioned that a fellow Canadian of hers, Six, who is one of the admins for the SWTOR Discord server was planning to join us too!

Around the time we got seated, Six showed up!  He drove from Canada, about 8 hours, that day.  It was great to meet him for the first time.  I never really interacted with him online, unlike everyone else!  The restaurant was super busy, which boded well for the quality of food.  Deep dish pizza is something I probably never had or had so long ago, that I don’t remember.  I’m vegetarian, so I opted for the veg pizza, and Swtorista was nice enough to share with me.  Deep dish pizza reminds me of lasagna instead of pizza!  Either way, delicious, but very filling.  I could only eat two slices!

The restaurant was about to close up at 10 PM, and I remembered I should check up on my roommate!  I needed to be present when he arrived, but I found out he was still planning to arrive around midnight.  I think we eventually left Giordano’s at 10:30 PM.  By that time, it started raining.  Six had his car and was willing to drop us off, which was super nice of him.  Kogass wanted to head back to his hostel on his own though.  So, Swtorista and I walked with Six, until it started raining really, really hard!  We found some cover, and Six decided to move ahead and grab his car so we won’t all get wet.  I did have a small umbrella, and a rain coat packed in my backpack.  I would have given up my umbrella to Swtorista (I main a Jedi KNIGHT, after all, hehe), but we waited for Six.

Six picked us up (road-side VIP service!), and I was the first stop.  I got back to my hotel around 11 PM or so, and waited until midnight for my roommate and his girlfriend to arrive.  My roommate’s mom, who lives in one of the Chicago suburbs, met me for the first time, briefly, and I helped them take their stuff up to the room.  We chatted for a bit and got to bed around 1 AM.

Hope you enjoyed my post! Next up will be Day 2!


Star Wars Celebration 2019 Recap – Part 1

I’ve been procrastinating a bit on writing this series of blog posts, but I certainly wanted to do it!  Star Wars Celebration was last month, and I still remember it fondly!  Everything Star Wars for 5 days, up from 4  days during Orlando in 2017.  Since a lot of exciting things happened during Celebration, I’ll split up this recap into multiple posts.  Probably 3 or 4 posts!

Day 0 (Pre-Convention)

My journey to Celebration started, well, at home! I got my badge near the end of March and promptly activated it.  I got chosen by the Light Side.  That was for a mini-game (Use the Force) at Celebration run by Amazon, where you had to scan QR codes hidden at certain key areas in the convention center.

CelebrationBadge

Rey never looked better!

I also signed up for the panel lotteries with my roommate, and we won all 4.  I know, I was shocked!  The list below is what we got into for the main panels.  Celebration stage was the live stage, while Galaxy and Twin Suns were the streaming stages.

  • Episode IX Panel – Celebration Stage
  • Galaxy’s Edge Panel – Celebration Stage
  • The Mandalorian – Celebration Stage
  • Episode I Panel – Galaxy Stage

I live in North Alabama and Chicago is not a bad drive, maybe 8 to 9 hours (600 miles approximately). Driving seemed like a smart and cheap option for me. I fortunately had relatives that I could visit before and after, and keep my car at their place instead of paying upwards of $30 per day for parking at the hotel. Another nice thing about driving is loading up on snacks and water for the convention from home. Bought a whole lot of protein bars, vitamin water, and some Propel (gatorade). Learned that the Propel stuff, while it had a nice citrus taste, probably wasn’t helping with the amount of sodium in it.  The vitamin water and protein bars were definitely good choices! In addition, other essentials I brought with me were hand sanitizer (avoid that con crud!), a poster tube (ironically didn’t use it much), and books for signing. My luggage bag of clothes was obviously filled with Star Wars shirts, and some cold weather clothing (hoodies and jackets). I brought my young Lando costume with me as well.  First time I had to fold a cape LOL! I opted not to bring a laptop, figured I would be too busy (and that was correct!).  I brought some cereal for breakfast at the hotel, along with a bowl.  I could at least eat the cereal with coffee every morning before heading to the convention.  I am a creature of habit and like to maintain a routine when it comes to meals, heh.

Anyways, onto actually leaving for Celebration… I left on Tuesday (April 9th) and it was a good day for driving.  It was actually really warm (80F) on a few rest stops along the way in  Tennessee and Kentucky.  My mom packed me some Indian snack food for the road (paratha if you are curious).  One of the rest stops was near the Kentucky and Illinois border at Metropolis, IL!  Yes, named after the hometown of the one and only Superman! They do have a Superman museum but I didn’t plan on taking an extended stop.  The rest area had one of those cardboard Supermans, without a head, so you could use it as a photo-op.

I arrived at my cousin’s house (recently bought, huge!) and hung out with my cousin, her husband, and their dog Biscuit!  My mom and I got Biscuit a squeaky toy, and Biscuit really liked it.  He wouldn’t stray far without his brand new toy.  Considering I’m not a pet owner, I was pleasantly surprised the gift went well!  In addition, we got a nice plate as a housewarming gift.  I ate dinner out with them at a Thai restaurant and rested up after a long day of travel.

Biscuit

Biscuit loved the toy!

The following day, Wednesday (April 9th), I had planned on visiting my uncle and aunt (my cousin’s parents) and doing some Indian grocery shopping for my mom.  Our area doesn’t have many Indian grocery options, and the sole store has a bit of a monopoly so my mom wanted me to buy certain essential dry groceries in Chicago.  Good thing I brought my car!  Not sure if any of you have experienced shopping in an ethnic store, but it is a bit overwhelming without someone with great knowledge of the products (like my mom or aunt).  My cousin’s husband and I were stumbling along, hoping to find whatever my mom indicated on her list or sending her pictures of items to make sure it was what she wanted.  That took about 2 hours between waiting for confirmation, searching for items, and talking to the owner.  At this point, it was past 2 PM and we still had not visited my aunt and uncle, so we decided to drive there and get something to eat for a late lunch!  My uncle has had health troubles and is in a wheelchair mostly these days.  It was a little hard seeing him in that condition, but I believe he was happy to see me there.  My dad and my uncle were close back in India where they grew up.  I spent most of the remainder of the day with my relatives.  My cousin joined us for dinner after  a few appointments / surgeries (she’s a doctor).  It was nice to have some home-cooked Indian food before eating out for the remainder of the trip, lol!

It was staring to get late, and I still had not checked into the hotel.  My relatives would have been willing to drop me off, but it is definitely out of their way.  My cousin’s husband would have to drive about 40 minutes to the city and 1 hour back home.  I told them I’d check out Lyft and see what the pricing was.  It was about $25 (+ tip) for a drive directly to my hotel.  Not bad at all!  Lyft conveniently gave me 50% off my next 10 rides (up to $6 total discount) shortly before the trip started.  Not sure why, but great timing!  I said my good-byes and headed off to the Hilton Chicago in downtown right off Michigan Avenue.  My hotel isn’t extremely close to the convention center (1.7 miles away), but it was the best my roommate and I were able to book after trying the booking service on the Celebration website.  I believe the room rate was $250 a night.  The hotel is a bit of a historic landmark for Chicago and had been featured in a few movies (Home Alone 3, The Fugitive).  My roommate wasn’t coming in until late Thursday since his girlfriend couldn’t get Wednesday off, so I had the double bed room all to myself on the night before!

hotel1

Hilton Chicago Hotel

So, after writing this, I realized how long this post was getting, and we weren’t even at Celebration yet!  I’ll continue my Celebration journey with the actual convention’s first day in my next post!

Rank 300 – Gearing Status

I haven’t posted in a while but a momentous milestone deserves a post and some analysis!

I have hit Rank 300 on my Guardian.  I won’t go into details with the Galactic Command system.  The first iteration was exceptionally grindy, but over time, it has gotten better.  The current CXP event helped push me to the finish line.

star-wars-the-old-republic-03-03-2017-23-35-04-02

Exciting moment but the crate sucked!

I felt like this would be a great time to determine how close I am to being best in slot  Each following picture will be of my current, best gear, almost exclusively acquired from Galactic Command crates.  The main exceptions are the 236 relic and one of my 236 set pieces.

The shell items aren’t always straight 236 or 242, since I moved around mods and enhancements.  In addition, I utilized the optimized prototype enhancements to bring my shells to at least 240 rating.  I will determine an effective item rating as the average of the various modifications in a shell.  The armorings are most important for the set bonus.  You will notice that I have all 7 set bonus armorings.  I could convert a 236 armoring into a prototype 240 rating.

Effective Item Ratings:

  • Earpiece – 242
  • Implant 1 – 236
  • Implant 2 – 240
  • Relic 1 – 242
  • Relic 2 – 236
  • Mainhand – 242 hilt, 242 mod, 240 enh = 241.3
  • Offhand – 240 armoring, 240 mod, 242 enh = 240.7
  • Helmet – 236 armoring, 240 mod, 240 enh = 238.7
  • Chestguard – 236 armoring, 240 mod, 240 enh = 238.7
  • Gloves – 236 armoring, 240 mod, 240 enh = 238.7
  • Belt – 242 armoring, 240 mod = 242
  • Bracers – 240 armoring, 240 mod = 240
  • Pants – 242 armoring, 242 mod, 240 enh = 241.3
  • Boots – 242 armoring, 242 mod, 242 enh = 242

The average of all 14 gear items will give the total effective item rating.

Total Effective Item Rating:  240

Compared to the horror stories I hear, I feel like I have had an above average experience with crate drops.  As stated, two of the items were from operations instead, but I felt like including them.  I haven’t upgraded any items with PvP unassembled components.  While Bioware did not promise gear targets based on certain number of command ranks, my experience seems to indicate that roughly 100 ranks were needed to get close to the gear level for the current rank.

I should stress AGAIN that I believe that I have had a much better experience with the crate RNG!  The drops for the most part are not satisfying.  The duplicates hurt even more along with the useless relic drops.

I did not record every single gear drop I had, but I did keep majority of the unique shells and almost all legendary shells.  The duplicate 230s and 234s were eventually disintegrated immediately.  I just want to clarify that the number of shells seen in my cargo hold below are not indicative of the actual number of drops that I have had!

cargohold_shells_edit

Who needs so many pants?

Item Ratings Legend:

  • Magenta – 230 rating
  • Green – 234 rating
  • Yellow – 236 rating
  • Purple – 240 rating
  • Red – 242 rating

The main reason I am showing the shells is to indicate how rough duplicate items are.  As one approaches needing just 1 or 2 pieces, it is much harder to fill in that missing slot through the crates.  I definitely recommend saving up your unassembled components for that missing piece.  First, grab the T2 legacy drop from a VM operation (majority are do-able with an average progression group).  Second, upgrade that T2 legacy to a T3 legacy using the unassembled components.

Of course, with the recent news regarding T4 gear and other changes coming with Update 5.2 (see the devtracker for details), I would hold off on upgrading gear pieces unless you are near the max for unassembled components.  Be smart, wait!

To summarize, my journey from Rank 1 to 300 has landed me close to a 240 item rating.  I believe I have had more luck than most people.  With upcoming changes to crate loot and the addition of a new tier, I am hoping that others will be able to gear up more easily!

Thanks for reading!

Part 2 – Fully Operational Gaming Station Series – The Build

In continuation of my first post in this series, I will be detailing my build process and the various challenges along the way.  Overall, it took me 2 nights for building, 1 night of troubleshooting Windows, and 1 night of minor adjustments.  If my last components (fans and RAM) arrived on the weekend instead of Monday, I would have done it all in one go.  Work gets in the way but it pays the bills!

Day 1 – Case Preparation and Fans

Since it would be troublesome to remove the stock fans after installing components, I decided first to knock out all of the fans including the CPU cooler radiator installation.  The Corsair Vengeance C70 case comes with 3x 120mm stock Corsair fans.  They are nothing special but would have been sufficient if I didn’t buy additional fans.  1 fan was mounted as rear exhaust, and the other two were mounted behind the storage drive bays as intake (pulling air through the bays).

My overall airflow plan was as follows:

  • 1x stock Corsair fan as rear exhaust
  • 2x AF120 Corsair red LED fans as side window intake
  • 2x SP120 Corsair red LED fans as front intake (in front of the drive bays, so pushing air through the bays)
  • Corsair H100i cooler (radiator + 2x stock SP120 fans) on the top as exhaust

First, I had to remove the 2x stock fans behind the drive bays.  Below is a picture of one of the stock fans I removed.

Corsair Stock Fan

Corsair Stock Fan

Second, I had to figure out how to install the 2x SP120 red LED fans onto the front.  I thought I would need to remove the drive bays, but that didn’t seem to be working out.  I then switched to popping off the front panel of the case (no screws, just tabs that needed to be depressed) and then mounting the two fans to the front.  There’s a filter on the front panel, so the intake air should be clean.  I chose SP120 fans at this location because the drive bays provide an obstruction to the air flow.  Higher static pressure fans can push air better through obstructions.  I used the provided case’s long fan screws for mounting.  Both fans connect up to a 4 pin splitter I bought, so they will be controlled by one fan header on the motherboard.  The fans are actually 3 pins, but the 4 pin splitter looked nice.

Corsair SP120 Fans at front of C70 Case

Corsair SP120 Fans at front of C70 Case

Next up were the side window intake fans.  I chose 2x AF120 fans since the air flow would not be obstructed here.  I used the screws that came with the fans this time around.  They are short but do the job.  The 120mm fan screw holes on the window also have fan rubber mounts, which help to limit vibration.  The installation for these fans went fairly quick with no issues.  I used another splitter for those too.

Side Window Fans

Side Window Fans

Last, but certainly not least, was the Corsair H100i CPU cooler.  The cooler requires a bit more effort since you need to assemble the fans onto the radiator first and then mount the radiator into the case.  The cooler came with decent instructions.  I decided to use the stock SP120s that came with the cooler.  The fans connect up to a 4-pin splitter that goes into the Corsair CPU cooler hub.  I could have connected the fans to a motherboard fan header, but then the Corsair Link software would not be able to control the fan speeds.  Here’s a picture with the fans installed onto the radiator.

Corsair H100i CPU Cooler

Corsair H100i CPU Cooler – Fans Installed

Mounting the radiator took some time.  Another set of hands to line up the holes and keep the radiator from moving would have helped!  There are a total of 8 mounting screws.  The top of my C70 case already had rubber mounts for the holes I was planning to use.  Once I got everything lined up and screwed in, here’s the end result of my labor!

CPU Cooler Mounted

CPU Cooler Mounted

I thought for a while if I was mounting this cooler in the correct orientation.  I could have flipped it 180 degrees with the tubing towards the back.  The main problem I foresaw at the time would be that I would need to twist the tubing to get the Corsair logo to face the correct orientation.  These small decisions eventually have consequences down the road.  This one was minor, but I will detail it when I run into it!  That was all of my work for Day 1.  It was a Monday, so I was ready to go to sleep.

Day 2 – Finishing the Build

With the case and fans ready to go, I was ready to move onto the motherboard.  I watched a few build videos, and the majority of them install the CPU and then the RAM before placing the motherboard into the case.  The CPU installation was the scariest part of the build!  You are holding a $360 chip!  My MSI z170 Gaming M5 motherboard had standard CPU installation instructions.  Turn back the lever, remove the CPU cover on the mobo, place the CPU onto the socket, close the bracket, and then bring back the lever to secure it into place.

MSI z170 Gaming M5 Motherboard

MSI z170 Gaming M5 Motherboard – CPU Cover On

Seating the CPU was rather scary.  I read warnings about not touching the bottom of the CPU (don’t want to mess up the pins) and about not touching the top in order to reduce the amount of dirt that gets on the CPU for cooler installation later on.  You have to hold the CPU on its sides and then line up the CPU with the socket (there’s an arrow on the bottom left corner that tells you if you have the correct orientation).  The first time around, I didn’t seat it correctly.  It twisted a little bit and was not lined up correctly at all!  I had to very carefully grab the CPU on its sides, lift it up, and gently seat it correctly.  I got it in on the 2nd try.  I gently pushed horizontally on the chip to make sure it was indeed in the socket this time.  The second scare with the CPU installation was locking it into place.  I felt like I was going to break it with how much force is required to bring the lever down into the locked position!  The Corsair RAM was easily installed.  Just pull the tabs, insert the RAM, and lock it in (should happen automatically).  One thing that I had to consult the motherboard manual on was which slots to use for the RAM.  I only had 2 modules, so I had to make sure I was taking advantage of the dual channel memory.  DIMM slots 2 and 4 were noted for 2 modules.  Below is the final picture of the motherboard with CPU and RAM installed.

Motherboard with CPU and RAM

Motherboard with CPU and RAM

Before I placed the motherboard into my case, I had to install the I/O shield.  I read that the shields were notorious for cutting fingers.  I managed to avoid that, but I did have trouble getting it perfectly into place.  In the end, I think it was OK and all ports are accessible, but maybe it could have been a little better.

I/O Shield In

I/O Shield In

Placing the motherboard into the case was another task where an additional set of hands would have helped tremendously.  The key to placing the motherboard is having all of the motherboard standoffs lined up and have the I/O ports in the shield.  The I/O ports never seemed to line up perfectly, and it may have been an issue with the shield.  I can still access all ports and connect to them, but they don’t seem to stick out like I expect they would.  I did manage to get all motherboard standoffs lined up.  My case has one center standoff that just sticks through the board (no screw), which does help with making sure you have it in correctly.  My case had motherboard screws, so I used those to secure it.

Motherboard inside!

Motherboard inside!

In order to avoid getting any dirt on my CPU, I decided now was the time to mount the cooler onto the CPU.  The H100i had decent instructions.  I won’t go into details.  Basically, you have 4 standoff screws that go near the 4 corners, the mount bracket sits on those screws, and the backplate (other side of the case) has to line up with the standoffs.  It was not too hard to figure it all out, but this is one task you shouldn’t consider as minor.  A bad cooler mount installation could mean inefficient cooling.  Up until this point, I had kept the protective cover of the cooler mount.  There’s thermal paste pre-applied on the mount, so no need to apply extra.  I made sure everything lined up correctly and all screws were firmly into place.

Cooler Mounted onto CPU

Cooler Mounted onto CPU

CPU Back Plate

CPU Back Plate

As seen in the cooler mounted picture, I did go ahead and connect the front I/O connectors and cooler connections.  Front I/O (Power Switch, Reset Switch, Power LEDs, HD LEDs, Audio, and USB 3.0 header) was not complicated but some of the jumpers were not labeled with positive or negative.  The first time around, I did not connect the HD LED and Reset Switch jumpers correctly!  Another minor issue but fortunately an easy fix.  The Corsair H100i connections were for the fans to the hub, pump to fan header (chose the CPU header), and hub to USB 2.0 header for Corsair Link integration.

Next up was the video card!  Fairly easy.  I initially did not remove the correct backplate output cover, but that was fixed quickly (silly mistake).  Placing the EVGA GTX 970 onto the PCIE slot was not a problem.  I did notice the card covers up the chipset heatsink with the dragon, oh well!

Video Card In!

Video Card In!

Another easy item to install was the ASUS optical DVD drive.  I did run into one problem though.  The drive would not fit in the first expansion bay at the top because it was long enough where it would hit the CPU cooler tubing.  My decision for the cooler orientation did have this one consequence.  Fortunately, I just moved the optical drive down one bay with no issues.  For this case, the drive was a screwless installation since all you do is slide it from the front, and the clips in the bay snap into place to secure it.

With the main components inside the case, it was time for the EVGA power supply!  The power supply was mounted at the bottom with the fan facing down (there’s a filter on the bottom, so clean air again).  It was screwed on the back.  There were more holes than actual screw holes, which threw me off initially.  My power supply has an ECO mode available, where it will not use the fan unless it really is needed.  The switch is strangely on the inside, so I flipped it on before I forgot about it.  Connecting the power cables was more time consuming than anticipated.  I had to feed the cables through the grommets and have them come out at appropriate locations to minimize excess cabling and have a cleaner look.  Some of the power cable connections (seen below) are segmented while others are not.  The CPU cable confused me for quite a while but I eventually figured out which side goes to the supply and which side goes to the CPU power connection on the board.  I had to use two SATA power cables (3 connectors each) since I had to power 4 items:  The CPU cooler hub, the ASUS DVD drive, old HDD, and old SSD.  My video card supported a 6+8 pin power connector, so I went with that.

PSU Close-Up Inside Case

PSU Close-Up Inside Case

PC Progress - No Storage Drives

PC Progress – No Storage Drives

Next up were the storage drives.  I decided to move my old drives, a HDD and SSD (with Windows), to my new computer.  I had to open up my old computer and grab the drives out!  I forgot how messy my old HP computer was on the inside.  I replaced the power supply when I added an ATI (AMD) Sapphire Radeon HD 5770 video card, but it was not modular.  I have included a few pictures of my old computer to show how must of a mess the inside was.

Removing Drives from Old Computer

Removing Drives from Old Computer

After I extracted the drives, my new case made installation fairly easy.  For the old HDDs, you simply slide out a hard drive tray, flex the tray (with screws already embedded) into the HDD, and then slide the tray back into the drive bay.  For the SSD, I had to screw it into a tray and then slide it back into the bay.

SSD Mounted onto Tray

SSD Mounted onto Tray

What I found troublesome about the storage drive installation was connecting the power and SATA cables.  There’s not a lot of room on the other side of the case at the front for any excess cables.  The side panel pops out in the middle, but near the drive bay, it tapers.  I was running into a lot of vibration problems after I turned on my computer.  The SATA cables and power cables were vibrating and transmitting it into the side panel, causing a rattling sound.  I had to redo the wiring to stop the vibration from being transmitted into the case.  In regards to the SATA cables, my motherboard had 4 that came with it, so I had more than enough.  I again consulted my manual to see which port was SATA 1.  I wanted my SSD boot drive to be on SATA port 1, but I somehow managed to get ports 1 and 2 switched around (maybe lost track of the cables).  Another minor issue easily fixed later on though.

With everything hooked up, I tried to work on cable management.  My case has 3 wire brackets on the non-window side that help guide wires along the grommets.  The only wires that were significantly off the tracks were the Corsair Link USB 2.0 header, CPU power cable, and fan cables.  It doesn’t look as clean as I would like, but it gets the job done.  If I get bored one weekend, I may redo the cabling.

Initial Cable Management

Initial Cable Management

I also noticed my case has a little cutout at the bottom right corner where the PSU is located on the other side.  I have not figured out exactly what that is for.  Perhaps it is an alternate location for a SSD.

At this point, I had everything in my case, hooked up, but I had not closed it.  The non-window panel required a little effort with those cables sticking out, but I got it in fine.  The window panel had problems though!  I did not realize how tall my video card would be.  My top window fan was above the video card, but my bottom fan kept hitting against the video card’s power cables.  The power cables are very stiff and there’s very little clearance.  If I put in a little more effort, I may have been able to find a solution that kept both side fans, but instead, I went with an easy solution.  I removed the bottom window fan, and replaced the stock fan used for rear exhaust with the former window LED fan.  Thinking back on my solution, I may have had to remove the bottom side window fan either way when I go SLI, so it was probably the best solution for future upgrading.

The computer build was finally over!  Unfortunately, it was 11 PM Tuesday night during the work week, so I decided to wait to turn it on.

Day 3 – It is alive!

Wednesday at work was rough, knowing I had a computer ready to turn on!  When I got off work, I immediately jumped into getting the computer cables in the back connected and finally turning it on for the first time!  Seeing the below BIOS splash screen was a relief!  The computer POST‘d fine.

First Boot Up!

First Boot Up! – “There has been an awakening, have you felt it?”

I went into BIOS immediately to check the settings.  I noticed the memory was running at 2133 MHz, so I enabled the XMP profile, which is a pre-built profile to overclock memory up to its designated rating, which in my case is 3000 MHz.  As I mentioned before, I noticed the HD LED didn’t turn on and that the SSD wasn’t on SATA Port 1, but I wanted to boot into Windows before fixing those issues.  When I rebooted with the new memory settings, I kept getting an error and had to revert to the old settings.  I was a little disappointed, but I decided to go ahead with the boot to Windows.

I wanted to use my old drives as is instead of doing a fresh install of Windows.  My SSD had my Windows 10 OS on it while my HDD just had my documents on it.  I didn’t anticipate the pain that would cause.  Windows kept giving me a memory management error.

Windows 10 Error

Windows 10 Error

When I read “memory,” I thought my RAM is bad.  However, MSI UEFI-BIOS detected both Corsair modules (just running at slower speeds).  After some researching online, I figured out that Windows didn’t have the drivers for my new system, so it was thinking it was the old one instead.  The hardware changes were so drastic that it couldn’t boot up.  I decided to pop back my storage drives into my old computer, so I could create a Windows 10 flash drive.  The Windows 10 repair utility would do the trick I hoped.  After creating the Windows 10 flash drive, I booted into it with my new computer (popped the drives back in too), and ran the repair utility a few times.  It would run and sometimes do a restart on its own.  I wasn’t sure it was working, but I finally did get into Windows!

Windows logged into my account fine, but I noticed it was not activated anymore.  It turns out that if you make significant changes to your free upgrade Windows 10 system, it will not recognize the machine.  The free upgrades don’t get product keys, so I couldn’t simply enter in the key.  I talked to Windows tech support that night, but I was informed that I would need to wait in the morning to get the activation center to take care of my problem.  In the mean time, I went ahead and installed all of the drivers and software for my new components.  MSI has a lot of software that comes with their motherboards.  One cool option for gamers is one free year of Xsplit Gamecaster premium subscription.  Corsair Link software allowed me to control my CPU cooler directly and change the LED lighting on it too.

Despite the Windows problems, I was pretty happy that the system booted up the first time!

Day 4 – Activating Windows, Minor Fixes, and Gaming!

Having got Windows finally working on Wednesday, Thursday was dedicated to the remaining issues.  I called Windows in the morning, and I got them to activate my Windows manually after verifying my Windows 7 key!  Very quick and easy too.  I was told that I would need to call them again if I wanted to do a fresh install.

My memory was still running at lower speeds.  I tried a manual overclock in BIOS, but it would not work at 3000 MHz.  Bumping it down to 2800 MHz did work though.  I was still not satisfied, so later I found out that outdated BIOS is usually the main issue with XMP profiles not working.  I flashed my BIOS with the latest version (1.4 versus 1.0) using M-Flash and XMP finally worked!  The XMP profile also did a slight overclock on my CPU from 4.0 GHz to 4.2 GHz.  Here’s the CPU-Z snapshot as proof!

3000 MHz Memory!

3000 MHz Memory!

In addition to these changes, I fixed the jumpers for the HD LED and Reset Switch (haven’t used that one yet).  I eliminated the vibration problem with my storage drive cables.  I ran SWTOR for the first time on the machine, and everything was pretty!  I feel my monitor is holding me back with 1600×900 resolution though.  I’m usually at very high FPS (80 to 100 on max settings) with less than 50% CPU load.

The final post in this series will focus on benchmarking and overclocking (CPU and video card).  I will end this blog post with pictures of my final build.  The red LEDs really make it stand out!  I’m looking for names for my PC.  I thought Kylo Ren would be appropriate with Episode VII coming out this year.

The Dark Side

The Dark Side

Final PC 1

And the Light

Final PC 3Final PC 4Final PC 5Final PC 6Final PC 7Final PC 8Final PC 9Final PC 10

"Your powers are weak old man" - Old versus New

“Your powers are weak old man” – Old versus New

Part 1 – Fully Operational Gaming Station Series – Components

Over the course of 2 months, I have been working on a new PC build.  While my 5 year old HP PC was working fine for SWTOR, it was starting to struggle with newer games such as Dragon Age Inquisition.  I expected it would have trouble with Star Wars: Battlefront as well.  Thus, I began my journey for my first custom built PC. I will split this journey by starting with the components.

All of the shiny parts!

All of the shiny parts!

CPU

I am a very frugal and deliberate person, so I was going to extensively research each new component before making my purchases.  Researching began in July.  The first decision to make was regarding the chipset and CPU.  My old machine was running AMD, but I decided to go with Intel since its new Skylake chips were coming out very soon in August and were priced at roughly the same as the previous generation of chips.  It didn’t make any sense to be running on an older generation CPU that cost the same as the next gen.  However, the new unlocked (overclocking is permitted, denoted by the K) CPUs, i7 6700K and i5 6600K, were on a new chipset architecture that required new z170 motherboards and DDR4 RAM.  Comparing to Intel’s Haswell i7 4790K / i5 4690K, they require z87/97 motherboards and DDR3 RAM, which are cheaper.  The older motherboards would be running the older chipset, may have less features, and support the lower speed DDR3 RAM only.  I decided to go with the new Skylake chips.

New Skylake CPUs

New Skylake CPUs (Picture from Anandtech)

The next decision to make regarding the Skylake CPUs was i7 or i5.  Core i7 6700K is a quad core processor with 4.0 GHz base frequency and 4.2 GHz turbo frequency (Turbo is like an easy OC speed to reach).  Hyperthreading is enabled so the PC will see 8 cores instead of just 4.  The i5 6600K is a quad core processor with 3.5 GHz base frequency and 3.9 GHz turbo frequency with no hyperthreading.  Please refer to the Anandtech article for more extensive details of the differences.  Pricing for i7 is approximately $360 while i5 is at $240.  Both chips are analogous to the previous generation equivalents, so I researched which one would be good for gaming.  Majority of the tech sites state that i5 is all you need for gaming.  If you plan on doing any CPU intensive tasks such as video editing, streaming, or multi-tasking, the i7 will be better for you.  I wanted a CPU that will allow me to do whatever I want easily, so I decided to go with the i7 6700K despite the price difference.

Buying the i7 6700K proved to be rather difficult.  The i5 6600K was in stock at major retailers (Amazon, Newegg, Tigerdirect, etc.) at the beginning of August, but the i7 6700Ks could not be found in the US market, only overseas!  I was not too worried since I was knocking out the rest of the components during August, but when I still had trouble finding the chips in September, I decided to start contacting retailers and Intel directly.  Most retailers said they do get a few in-stock but they sell out quickly (always missed them while at work).  Intel told me that the i7s will be easy to find at the end of September.  I even asked Intel employees at PAX Prime about it, and they told me my best shot was to wait or try to win one (such a tease) at their booth (which didn’t happen of course).  Both answers I didn’t like!  Since I knew there were small quantities being sold, I placed an in-stock alert at NowInStock.com.  On 9/8/2015, I was finally able to purchase the CPU from Newegg!  Newegg only offered the purchase as a combo with a motherboard, so I grabbed two items with one order.

Intel Core i7 6700K

Intel Core i7 6700K

Motherboard

Since I made the big CPU decision already, only z170 motherboards would be compatible with my CPU.  These motherboards have the latest chipset and DDR4 RAM capability as the big differences compared to older motherboards.  The main motherboard manufacturers are MSI, Gigabyte, ASUS, and ASRock.  I eliminated ASRock since I was not too familiar with their products or knew anyone that had used them.

With the motherboards, I found it much easier to prioritize features and make a listing on a spreadsheet so I can see in one spot all of the relevant information.  Main features I was looking for were:  2-way SLI (need 2x PCI-E slots for video cards), USB 3.1 ports (Type A, conventional, and Type C, new connector type), USB 3.0 header for my case, USB 2.0 header for my cooler’s link software, at least 5 fan headers (3x chassis + 2x CPU), and at least 1 M2 (low profile SSD) slot.  I managed to narrow down the options to 10 boards.  From there, I started to look at both price and combos available at Newegg with the i7 6700K.  I finally got down to 4 choices, ASUS Maximus VIII Ranger ($240), Gigabyte Gaming 7 ($220), MSI Gaming M5 ($180), and MSI Gaming M7 ($230).  All met my needs, although I felt ASUS and Gigabyte were too expensive for software features that I would not used that much.  The MSI M7 did not have much over the M5 besides a better I/O shield, software, and other cosmetic features.  I talked to all of the manufacturers at PAX Prime and tried to win a free motherboard at MSI and Gigabyte booths, but no luck!  When the i7 6700K was in stock, I jumped on the MSI z170 Gaming M5 motherboard + i7 6700K Newegg combo priced at $525 with shipping.

When the package arrived with the motherboard and CPU, the shipping box was badly damaged.  I was a little worried about the state of the components.  I tweeted to Newegg and they refunded me my $5 shipping cost.  Also, there was an additional $20 off the motherboard at the time of the combo purchase.  I wrote them to mention that the code was not applied at checkout.  Instead of refunding me $20, Newegg gave me a $50 gift card!  I put that card to use with my RAM purchase later!  I saved an extra $55 thanks to Newegg customer service, so my effective cost was $470.

MSI z170 Gaming M5 Motherboard

MSI z170 Gaming M5 Motherboard

Memory

Going with Skylake also limited my memory options to DDR4.  Corsair, GSKILL, Crucial, and Kingston are the main memory manufacturers out there.  When choosing memory, you want to look at size and speed.  Z170 motherboards only support dual channel memory, so buying a kit of 4 modules is not necessary.  After watching various videos regarding PCs the past few weeks (Linus Tech Tips is amazing), you don’t really need more than 8 GB for gaming at this time.  If you plan on multi-tasking, more is better, but going overboard just doesn’t make sense.  In order to take advantage of dual channel and have some extra memory for other tasks, I decided that 16 GB in 2x 8 GB modules would be sufficient.  If for some reason that isn’t enough, I can always upgrade later.

DDR4 memory is more expensive in general but the prices have been trending down with the introduction of Skylake making DDR4 more mainstream.  As a side note, during my journey to build this PC, I utilized the Build a PC sales subreddit and PC Part Picker extensively.  The subreddit is great for catching amazing deals.  PC Part Picker is very useful in narrowing down component options and creating price alerts.  Back to memory, PC Part Picker helped give me a listing of memory kits available.  Next up was deciding on the speed.  Legit Reviews had an interesting article on this exact topic.  They tested various memory speed modules and compared the cost per performance using GSKILL modules.  They found the sweet spot to be 2666 MHz.  Now, I was looking for 2x module 16 GB kits at 2666 MHz or higher.  In terms of cost, Kingston was eliminated, and I couldn’t find Crucial kits that met my requirements.  I was down to Corsair and GSKILL.  The Corsair 3000 MHz modules were discounted by 10% at Newegg while the GSKILL were not.  The 2666 MHz and 2800 MHz modules were not discounted, which I thought odd.  At the time, my last component to buy was the memory, and with my motherboard and CPU on the way, I didn’t want to wait for a better deal.  I pulled the trigger on the Corsair memory despite the negative reviews.  Turns out, the reviews may not be valid and were user error or motherboard issues.  I was able to apply my $50 gift card to this purchase too.  The memory cost me $135 before gift card.  It looks great and matches well with my motherboard.

Corsair Vengeance LPX 16 GB 3000 MHz

Corsair Vengeance LPX 16 GB 3000 MHz

Video Card

I am somewhat going out of order with how I purchased my items.  My video card was purchased before the rest of the items here.  It is not dependent on the chipset architecture, so I was able to purchase it when it came on sale for a good price.  With any video card, you usually decide between AMD or NVIDIA first.  I previously ran with an ATI (now AMD) Sapphire Radeon HD 5770.  No real problems with the card, so I had nothing against AMD.  I talked to a few people within my guild, who almost exclusively had NVIDIA.  I also asked around on twitter (thanks to @2ndsith for answering my various questions / providing feedback!).  I was not planning on buying a very expensive card, like a 980.  Lot of my research brought me back to the 970, a solid card, not too expensive, but it had a VRAM issue.  The VRAM issue was explained fairly well by JayzTwoCents and NCIX Tech Tips (Linus).  Without going into details, instead of 4 GB, you will get 3.5 GB at normal speeds and 0.5 GB at lower speeds.  Most games do not use more than 3.5 GB of VRAM, so it is not really a big issue.  When the Build a PC sales subreddit notified me of the EVGA GTX 970 FTW+ (their top end card according to this chart) was at $320 on Newegg, I jumped on it.  A $20 mail-in-rebate was included with that price, so there was a little hassle doing that, but overall, I thought the price was great.  I verified that this price was a new low for it too!  I looked at other video card manufactuers (ASUS and MSI), but I decided to go ahead with EVGA.  Good customer service and high quality products.

With the card, I also got Metal Gear Solid V:  The Phantom Pain game code for free.  I am not really into Metal Gear and thought I could flip the code for some money.  I went to the Game Sale subreddit and was able to sell the code for $35 using Paypal.  I was a little apprehensive about it, but the buyer immediately sent the money over after I showed proof of the purchase.  Then, I emailed the code to him directly, and he had no issues redeeming.

I am tentatively planning on getting another GTX 970 for SLI in the future.  There’s really no rush since this card will knock out SWTOR, Dragon Age Inquisition, or anything else I throw at it for the time being.

EVGA GTX 970 FTW+

EVGA GTX 970 FTW+

Power Supply

Going back in time again, before grabbing my video card, I purchased my power supply.  The only real requirements for my power supply were modular (cables are separately attached, much cleaner and easier to work with), at least 750W for future SLI, and decent warranty.  My guildmate Boernich helped guide me when it came to what I needed for SLI as well.  I used JonnyGURU.com for really solid power supply reviews.  They know what types of electrical components are good quality, do a wide range of tests on PSUs, and give a nice concise summary.  Also, Tom’s Hardware forums have an amazing PSU Tier List that gives you a general sense of which brands are reliable.  EVGA and Corsair were some of the best brands out there.  When Newegg had an EVGA PSU sale, I decided I would buy one of them.  Corsair’s tended to be priced higher, although, now their prices are much more competitive.  In order to have a little more headroom in terms of future overclocking, I decided to go with an 850W PSU.  EVGA has multiple power supply brand series and at different 80+ ratings / efficiency.  My goal was an 850W PSU with Gold or Platinum ratings.  I went with the EVGA SuperNOVA P2 850W PSU from Newegg.  It has an amazing 10 year warranty too!

Pricing was a little strange, had to jump through a lot of hoops on this one.  Base price at purchase was $180.  With promo code and shipping, it would cost me $150 before the $20 mail-in-rebate.  The item’s base price dropped $20 a few days after I purchased it.  Newegg refunded me the difference.  I also told them that the rebate increased to $30 from $20.  They issued a $10 gift card for that difference.  In the end, including refund, gift card, and rebate, the PSU cost me $100!

A few other notes regarding this PSU. JonnyGuru now has the review up for it! 9.7 out of 10, with marks off for value (for me, doesn’t apply!).  This PSU came with a 24 pin tester, so I was able to test the PSU immediately.   This was a nice touch, especially since the PSU arrived mid August, and I wasn’t even close to gathering up the remaining components.  It has no monitoring software like Corsair’s HX 850i but not a deal breaker for me.  The EVGA PSU has an ECO mode which reduces fan use when under low load.

EVGA SuperNOVA P2 850W PSU

EVGA SuperNOVA P2 850W PSU

Case

Roughly around the same time I grabbed my PSU, I ordered my case off Amazon.  When looking for a case, I wanted a black mid tower (more room for components and wiring), side window (looks cool), lots of cooling options (fan + radiator mounts), USB 3.0 in the front, and finally a case that is easy for building.  There are so many options out there for cases, but I stuck with researching the more popular ones: Corsair, NZXT, and Cooler Master.  I had price alerts set for several cases from all of these brands.  Eventually, one popped up on Build a PC sales subreddit that was at an astounding price, the Corsair C70 Vengeance case.  The base price for Amazon was usually hovering around $140.  The discounted price was $90!  That was the lowest price for that case according to PC Parts Picker.  It has amazing reviews, meets all of my requirements, really cool carrying handles, all metal front side, side panel clasps (no need for screws), dust filters on front and bottom, and easy cable management brackets on the back for routing.  On top of that, I had Amazon gift cards that I needed to burn, so this case was basically free in the end, but $90 for that case is a steal in my opinion.  The down sides cosmetically were the fan mounts on the side panel window.

Corsair C70 Vengeance Case

Corsair C70 Vengeance Case – Cool Power button and Reset button (with flip cover)

Side Panel Window - 2 Fan Mounts

Side Panel Window – 2 Fan Mounts

CPU Cooler

The CPU cooler came later in my purchase order.  With the CPU cooler, I had to choose between a standard fan + heatsink or all-in-one liquid cooler.  My case supports a radiator mount at the top so I had no limitations from the case.  I have not touched liquid cooling before, so my curiosity along with the proven performance of liquid coolers made me go with a liquid CPU cooler.  There are certain fan + heatsink coolers out there that can keep up with liquid coolers (and are much cheaper) but you would normally need to replace the stock fans and look sort of ugly.  Corsair is the most popular brand for all-in-on coolers, and I decided to stick with them again.  I wanted to buy a 240mm cooler for the proven performance over the single 120mm coolers.  The older H100i or the newer H100i GTX were my two options.  The performance was roughly the same, so I went ahead with the older and cheaper model.  I grabbed the Corsair H100i for $90 off Amazon.  Not heavily discounted but it is about $15 to $20 lower than standard pricing.  I was able to use my Amazon gift card balance for this item too.  These models are harder to find, and I believe the discounts I noted at the time were meant to sell off the remaining stock and focus on the new model.  The cooler comes with 2x SP120 mm fans.  No need to replace them.  Through a USB 2.0 header, you can get real-time data from the cooler and control it via the Corsair Link software (and change the LED lighting!).

Corsair H100i CPU Cooler

Corsair H100i CPU Cooler – Fans Installed

Misc Components

For the chassis fans, I wanted to add a little flavor to this build and get LED fans.  The 3x stock case fans are fairly normal, and I was willing to replace them.  The Corsair LED fans were a little expensive at 2x fans for $20, but they were reliable according to reviews and had a great lighting pattern so I went ahead with them.  I wasn’t really sure on what colors to go with.  My motherboard was already purchased, which has a red and black theme to it.  I decided to put up a poll on my twitter account!  Red was the winner, so I bought two twin packs of Corsair AF120 (AF = good for areas without obstructions) and SP120 (good for areas with obstructions) from Newegg.  Bought both for $21, but AF120 had a price drop on Amazon of $3 and with Newegg’s Iron Egg Guarantee (Price guarantee), I got a gift card for the difference.  Minor price change, but I noticed it so I went ahead and got the price difference back, although it is in gift card form.

Since I was planning on having a total of 5 chassis fans (the above mentioned plus one of the stock ones for the back), I had to buy splitters because my motherboard only has 3x chassis fan connections.  Turns out I didn’t need one of them due to an unexpected complication that I will talk about in the next post in this series.  Either way, I bought Silverstone 4 pin fan splitters for $4 each.  My chassis fans were only 3 pins, so I could have gone with a cheaper option, but the rest were ugly (no black sleeves)!  3 pin fans are controlled using voltage while 4 pin fans (PWM fans) are controlled using power modulation (using signal bursts to control speed).  PWM fans are in general more expensive and most motherboards can easily “tune” 3 pin fans and generate a curve for RPM vs temperature.

Corsair SP120 Fans at front of C70 Case

Corsair SP120 Fans at front of C70 Case

For optical drive, I went with the highly reviewed ASUS 24X DVD Burner 24B1ST from Newegg for $15.  These are so cheap, and can be rather useful if you need to burn a disc or to load software / drivers.

For my SSD and hard drive, I decided to reuse my old computer’s drives, a Samsung 850 EVO, 256 GB SDD, and a Seagate 750 GB hard drive (came with HP computer).  I bought my SSD a few months ago for $100 off Amazon.  SSD prices have started to drop a lot this year, and now you can get this SSD for $80 if you grab a good deal.  I am hoping to buy a 500 GB Samung 850 EVO SSD for $150 or below eventually, but for now, no immediate need.  Another good reason for reusing my old drives is no need to reinstall Windows and all other programs.  Turns out this drive swap idea wasn’t as smooth as I envisioned, but I will go into detail in my next blog post.

For my peripherals, I did not buy any new ones for this build.  I am using a Logitech G600 MMO gaming mouse (only 2 months old, but works well, grabbed it for $35).  The keyboard is a standard HP one that came with my old computer.  I am thinking of grabbing a Corsair Vengeance K70 keyboard.  My headset is rather new as well, Sentey Symph, and cost $30 on Amazon.

For my monitor, I will need to upgrade it, but I am willing to wait for a good deal.  My monitor is a standard 20″ HP 2010i, with max resolution of 1600×900 at 60 Hz, that came with my old computer.  I am thinking of grabbing a 2560 x 1440 (2K) monitor, perhaps with G-SYNC capability.  G-SYNC monitors are so expensive still.  I am rather receptive to monitor suggestions!

Summary

Here’s a comprehensive breakdown of what I bought for the new computer, when I bought it, and how much it cost (including rebates, refunds, etc.).  I will include the Amazon purchases, although, I was able to use gift cards to get those for “free”.

New PC Build:

  • CPU & Motherboard Combo:  Intel Core i7 6700K + MSI z170 Gaming M5 Motherboard
    • Purchased:  9/8/2015
    • Cost:  $470 (includes refund and gift card)
  • Memory:  Corsair Vengeance LPX 16 GB 3000 MHz
    • Purchased:  9/12/2015
    • Cost:  $135
  • Video Card:  EVGA GTX 970 FTW+
    • Purchased:  8/18/2015
    • Cost:  $285 (with rebate and game code sale)
  • Power Supply:  EVGA SuperNOVA P2 850W
    • Purchased:  8/12/2015
    • Cost:  $100 (with rebate and price refunds)
  • Case:  Corsair C70 Vengeance
    • Purchased:  8/13/2015
    • Cost:  $90 (used Amazon gift card)
  • CPU Cooler:  Corsair H100i
    • Purchased:  9/5/2015
    • Cost:  $90 (used Amazon gift card)
  • Fans:  2x Corsair AF120 Red LED + 2x Corsair SP120 Red LED fans
    • Purchased:  9/12/2015
    • Cost:  $39 (with price match refund)
  • Fan Splitters:  2x Silverstone 4 pin fan splitters
    • Purchased:  9/12/2015
    • Cost:  $8
  • Optical Drive:  ASUS 24X DVD burner
    • Purchased:  9/8/2015
    • Cost:  $15

Total:  $1232

This first build article turned out to be quite long!  I was thinking my build story would all fit into one post, but dividing it up seems to make the most sense.  Next up will be the build itself and the minor troubles I ran into along the way.

SWTOR – Authentic Star Wars but not Canon

For any fan of the Expanded Universe (EU) which consisted of Star Wars material beyond the movies such as books, comics, and games, the announcement made by Lucasfilm last year to clean the slate and start a new canon was a shocker.  But where did SWTOR fall in this new canon?  I’ll briefly describe the EU and its troubles and move onto the new canon and how SWTOR fits in it.

The Expanded Universe

The EU roughly started in 1978 with the release of Alan Dean Foster’s Splinter of the Mind’s Eye and up to last year, contained thousands of works.  The material spanned the Old Republic era (KOTOR and SWTOR) through to 100 years after Return of the Jedi.  With so many works in the Star Wars setting, Lucas Licensing and their continuity experts did make an attempt to keep one consistent story throughout the content.  However, due to inevitable contradictions, different levels of canon were defined.  “G-Canon” which stood for George Lucas material like the movies trumped anything else.  Next came “T-Canon” that stood for TV material like The Clone Wars.  Following that was “C-Canon” which was basically any material approved in the continuity timeline and should be respected by future authors and contributors to Star Wars.  Majority of the EU was “C-Canon” but “G-Canon” and “T-Canon” were supreme.

The best and most popular example of “C-canon” would be Timothy Zahn’s Thrawn Trilogy.

First book in the Thrawn Trilogy

The Thrawn Trilogy felt just like the movies, epic story with our favorite heroes from the original trilogy and the introduction of new characters like Mara Jade and Grand Admiral Thrawn.  It takes place after Return of the Jedi, so it did not contradict anything from the movies.

While the Thrawn Trilogy was a great addition to Star Wars, not all materials were up to the same caliber.  With most of the EU materials coming after the movies, many new fans who wanted to get into the EU were discouraged by the “required reading” to get up to speed with the latest Star Wars books and comics.  As already mentioned before, contradictions in materials became inevitable as well.  The Expanded Universe was cherished by those of us fans that religiously read each book/comic and played the games, but it certainly was not perfect and clear.

The New Canon

The first major event leading up to the new canon would be Disney’s acquisition of Lucasfilm in 2012.  In addition to acquiring Lucasfilm, Disney stated that it would be planning Episode VII!  Star Wars fans including myself were ecstatic that we’d see Star Wars return to the big screen.  The question among the EU fans was what would happen to the EU materials, particularly those following Return of the Jedi.

The answer to that question came in the form of a blog post on the official Star Wars website and video titled “The Star Wars Expanded Universe: Past, Present, and Future” on April 25th, 2014.  I’ll summarize the main points:

  • All movies (prequel and original trilogy) are canon along with The Clone Wars (movie and TV series).
  • Any of the previous EU material is not canon anymore.  It will be branded as “Legends” instead.  Books and comics would have the “Legends” banner.

    Heir to the Empire with Legends banner

  • In the blog post, post Return of the Jedi material was not declared to be canon in order to allow freedom in storytelling for the new trilogy of Star Wars movies, starting with Episode VII.
  • The first works in the new canon will be John Jackson Miller’s A New Dawn and the Star Wars Rebels TV series.  Both have been released as of this blog post.
  • Anything released, including books, comics, and games will be canon.
  • Certain elements from the EU could become canon, but it wouldn’t make that original EU work canon.
  • The Lucasfilm Story Group (see the video for more details) will review each Star Wars work and ensure it aligns with the new continuity.

While it is clearly stated that the post Return of the Jedi EU material is not valid, many fans of Knights of the Old Republic 1 /2 and Star Wars:  The Old Republic clung onto the hope that these games could become canon.  The Old Republic era is thousands of years prior to the movies and has little chance to contradict any new canon material.

Is SWTOR canon?

Ever since this new canon announcement, I have heard countless debates on podcasts and fan sites analyzing whether SWTOR is canon.  For myself and others, I thought it was rather clear cut.  Any prior Star Wars material besides the movies and TV series was not canon, so SWTOR was not canon.  Others felt that since it was not directly announced as not being canon and that the Lucasfilm Story Group was credited in the latest expansion, that SWTOR could be canon or at least partially canon.  SWTOR’s setting thousands of years prior to the movies does minimize any contradictions.

This past weekend, the Star Wars Celebration Anaheim – One Big Story Star Wars Canon Panel – finally gave us SWTOR players a definitive answer.  Pablo Hidalgo and Leeland Chee, members of the Lucasfilm Story Group, answers a few questions pertaining to SWTOR.

One Big Story Panel – Lucasfilm Story Group

Here are the pertinent quotes regarding authentic versus canon and the other pertaining to SWTOR expansions / timeline.

Hidalgo: “We talk about canon and we talk about authenticity…there are certain experiences that are tailor made to exist in our world.

I would recommend the reader to look through the full live blog to get the context.  Star Tours was the original context, but the concepts mentioned here are interesting.  I want to bring up the point that the Lucasfilm Story Group does review all Star Wars content for authenticity (does it feel like Star Wars) but that does not mean it is canon.  Star Tours is authentic but not canon.

Are The Old Republic expansions canon?

No — BioWare “has created their own universe that is so fantastic,” we’re not going to change it, says Hidalgo.

The question only states expansions, but clearly SWTOR is not canon.  First definitive answer.

When are you going to explore the Old Republic part of the timeline?

“It’s definitely not off the table.” — Chee

Since SWTOR is in the Old Republic era and there are no plans yet for canon material, SWTOR will not be directly contradicting canon at least.

SWTOR, according to the Lucasfilm Story Group, is authentic but not canon.  The Story Group does enjoy the content from Bioware and certainly reviews the future updates for authenticity.  They will not change anything as long as it does not contradict the new canon.  For us players, I don’t think this will change anything.  The story may not be part of the new canon, but it is still the Star Wars we know and love.

Thanks for reading!  Please let me know your thoughts.

SWTOR Content Cadence

While I did not get around to publishing an article about the Gree, I thought about sharing a spreadsheet I’ve developed after the question was posed by some of my twitter friends (@talionbot and @heather_pls) about the timing between expansions and what constituted an expansion to Bioware Austin.

I meticulously went through all of the information located on the official SWTOR site’s Game Updates and Patch Notes pages.  After recording the name of the major game update (ignoring the minor ones which usually were fixes and not content related) and the date they went live, I made a simple formula for calculating the time until next update.

You can view my Google spreadsheet here!

Game Update Notes:

  • The first year before 2.0 had updates that were released at irregular intervals.  I can only assume this is due to the craziness of launching the studio’s first MMO.  There were probably assets developed for content that wasn’t ready at launch and required more work for a future game update.
  • From 2.0 to 3.0, the update intervals tended to be 8 to 9 weeks and more consistent.  With the addition of new systems such as Galactic Starfighter and Galactic Strongholds, this is quite impressive!
  • Although we only have one new content update past 3.0, it appears that the update intervals are getting longer, up to 11 weeks for tentative release of 3.2.
  • For major expansions, 1.0 to 2.0 was approximately 1 year and 4 months while 2.0 to 3.0 was 1 year and 8 months.  While the length between major expansions is increasing, it should be noted that digital expansions were released during the 2.0 to 3.0 era.  At this pace, I expect 1 expansion at the end of this year or early next year (more realistic).

Operation Notes:

  • I was not able to discern any relevant patterns or a regular cadence for operation updates.
  • When looking strictly at the introduction of new operations, the 1.0 and 2.0 ops tended to be released at half year intervals.
  • 3.0 operations (Ravagers and Temple of Sacrifice) however were released more than a year after the last 2.0 operations (Dread Fortress and Palace)!  This gap in operations content is alarming!

Flashpoint Notes:

  • Again, no consistent cadence for flashpoint updates.  During 1.0, only 2 FP updates were given, Kaon Under Siege and Lost Island.  The game did launch with 15 FPs, so I feel this is expected with the bigger focus on filling the lack of endgame content.
  • Between Lost Island and the level 55 HMs, there was almost a year of no new FP content!
  • Starting in 2.6 with the introduction of Tacticals, FPs were delivered at quicker intervals and there wasn’t a large gap since the year gap noted above.  It is rather clear there is a bigger effort to deliver FPs, first at the tactical level and later the corresponding HMs.

PvP Notes:

  • I have only recorded the major content updates, not any of the seasons / introduction of ranked.
  • There are only 4 updates of note:  Novare Coast, Ancient Hypergate, Arenas, and Quesh Huttball.
  • The length of time between updates varied, but it is on average greater than the operations or FP updates.  There were two times where 200+ days passed before a major PvP update was released.
  • Most people in tune with PvP already knew that PvP is not a focus for Bioware, and the timeline of updates does point to this unfortunately.
  • While not recorded, it has been almost a year since the last PvP update!

Please let me know if I made any errors on the spreadsheet.  I intend to keep this updated for future SWTOR updates.  If you have any other insights into the data, please post a comment!

I made this spreadsheet to give all of us players some insight into content updates.  Bioware Austin has certainly been working hard to give us new content in SWTOR, and I’m not intending to bash them by using this data.

The Guard Dilemma

Introduction

As promised in my previous post, the next topic I will discuss will be about who to place your Guard on in SWTOR.  Unlike previous MMOs I played where I was melee DPS, I chose to go with the Guardian Tank as my first and only character (yes, I like to focus on one character) for the first two years of the game.  I did not participate in operations until late 2013 with my current guild, Pillars of Ashla.  First, I will talk about the mechanics behind Guard!  It is always important to understand the basics!

Yajard in Battlemaster PvP Armor

Yajard in Battlemaster PvP Armor

Guard Mechanics

The Guard ability is available to all Tanking Advanced Classes (AC) in SWTOR.  It requires the use of the AC’s Tank stance in order to be available as an ability.  A tank applies Guard to a player or companion by clicking on that character and toggling on Guard.  Here’s the tool tip for the Guard ability.

Guard Tool Tip

Guard Tool Tip

Important notes from the Guard Tool Tip:

  • Activation Range:  30 meters for activating;  not an issue if you place Guard before a fight.
  • Damage Reduction:  5% less damage for the guarded player.  Doesn’t matter how far away the player is from you!  Many beginner tanks feel that the damage reduction is tied to the 15 meter PvP range, but this is wrong.
  • Threat Reduction:  25% less threat for the guarded player.  Again, doesn’t matter how far away the player is from you.
  • PvP Range and Redirected Damage:  During PvP, if the guarded player is within a 15 meter range, 50% of the player’s incoming damage from enemy players will be transferred to the tank guarding them.  Note that in PvP, the 5% damage reduction also applies to the player being guarded, no matter the distance from the Tank.
  • Stance Requirement:  As previously mentioned, the tank must be in his tank stance. For Jedi Guardians, this is Soresu form.

A guarded player or companion in this case will have only one buff if guarded and within the 15 meter range for PvP redirected damage.

Guard Protection Info Buff

Guard Protection Info Buff

If the guarded player or companion is outside of the 15 meter range, two buffs will be shown instead.  One is the same shown above, but there’s also another seen below.

Out of Range for PvP Redirected Damage

Out of Range for PvP Redirected Damage

This “Out of range” buff is only applicable for PvP redirected damage.  Note that the Tank is indeed outside the 15 meter range, which is the limit as indicated on the Guard tool tip.  As far as I know, there doesn’t appear to be a PvE limit to the 5% damage reduction and 25% threat reduction buffs from Guard.  As long as the Tank and the guarded player are on the same instance of either a planet, Flashpoint, or Operation, the passive benefits of Guard will still apply no matter the range.

The Choice of Who to Guard

Now that the basics are out of the way, I will go into detail on how I choose who to guard.  There are obvious Guard mechanics that favor certain choices over others, but I also inject some subjectivity into my choice.  Since Guard acts differently between PvE and PvP, I will split the discussion into those two categories.

PvE Guarding

In PvE group content, Flashpoints and Operations, the Tank’s role is to maintain threat and take the majority of the damage.  While I won’t go into detail regarding threat mechanics, healers in general will generate less threat per damage healed than either the Tank or DPS.  Tanks get multiple threat modifiers from their stance, abilities with additional threat, and taunts.  DPS will generate threat mainly by their damage on a 1:1 basis (1 damage = 1 threat).  Since threat generation increases for those closer to a mob, if ranged and melee DPS are roughly equivalent, melee DPS will most likely have higher threat.  If I find a good consolidated guide regarding threat generation mechanics, I will include it here.  Please let me know if you know of one!

Guard will give a player both 5% damage reduction and 25% less threat generation.  The 25% threat reduction is extremely valuable in PvE content and should be the primary basis for choosing who to guard.  A proper tank should be able to maintain threat on a boss, but DPS in particular can sometimes steal aggro.  Guard will help with this!  Thus, always pick DPS over healers for Guard!  I admit that when I first started this game and was new to tanking, that I placed Guard on my healer in Flashpoints.  I quickly learned that is not the right choice!

So far, I’ve placed DPS as the only group members that should be guarded.  To further narrow down my choices, I take into consideration the class and armor type of each DPS character.  I prefer to guard melee over ranged due to threat mechanics.  In addition, I consider the armor class of each DPS character.  While armor class does not account for other forms of mitigation, it does give a sense of the survivability of DPS.  The 5% damage reduction on a guarded player is not much, but it is useful to have!  Here’s a priority Guard list that I use based on class.  If a player is stealing aggro on a consistent basis, I will adjust as needed.

PvE Guard list from higher to lower priority (Republic classes – All DPS spec):

  • Jedi Sentinels – Melee DPS, medium armor, and personal experience have Sentinels at the top.
  • Jedi Shadows – Melee DPS and light armor.
  • Scoundrels – Melee DPS and medium armor.  I just don’t see them a lot, so I put them lower on the list.
  • Guardians – Melee DPS and heavy armor.
  • Vanguards – Melee DPS and heavy armor.
  • Sages – Light armor but ranged so lower on the list.  In AoE situations, I may switch guard to a Sage.
  • Gunslingers – Ranged DPS and medium armor.
  • Commandos – Ranged DPS and heavy armor.

With my analytical approach having established key guidelines, the rest of the decision on who to guard becomes subjective.  There are a few personal parameters that I consider, totally subjective and sometimes silly!  I only employ these subjective guidelines when I’m looking at roughly equivalent DPS, such as 2 Sentinels.

Subjective Guidelines:

  • Respect – I value respect a lot, especially when it is found on the Internet where some feel that they can hide behind their anonymity.  Someone that doesn’t insult other group members will get a Guard.
  • Politeness – Related to respect, but I consider it its own guideline.  There have been situations, usually in PUGs, where I am demanded to give someone Guard.  If that person is stealing aggro, it would be a reasonable request.  If there is no basis to that person being guarded, they will be lower on my list than they were before!  Some have politely asked if they could receive a Guard, and I am receptive to these requests if it makes sense.
  • “Special” Qualities – There’s always someone in the group that makes their character look absolutely silly by either appearance or emotes.  I appreciate a little humor now and then.  Lightens the mood and emphasizes that we are playing a game for fun!  In the below operation picture, the Sentinel gets my bubble of Guard protection for using the “No Bones Dance” emote!

    Use funny emotes?  You may get a Guard!

    Use funny emotes? You may get a Guard! Didn’t catch him with No Bones Dance however 😦

PvP Guarding

Unlike PvE, threat is not applicable.  Tanks are meant to take damage from enemy players as much as possible.  This means placing Guard on whoever will be taking the most damage at any particular time within the 15 meter range.  In most situations, the default choice is the healer.  The healer will almost always be targeted first.  If a healer is not in the area or the opposing team has decided to focus on another teammate, switch Guard to another player!  In situations where the Tank is asked to guard a node, consider placing your Guard on a teammate before heading to that node.  While you won’t be able to redirect enemy damage, the 5% damage reduction from Guard does help.

Conclusion

That concludes my guidelines on how I choose who to guard in PvE and PvP!  The PvE choice is based primarily on mechanics and then has a few subjective guidelines applied.  For PvP, it is much more straightforward based on mechanics only.

My next article may be related to the Gree since the event is finally coming back!  The Gree vocabulary has always fascinated me.  See you again soon!

Testing 1, 2, 3…

Hi all, R2 here!  I am starting a new SWTOR blog that will capture some of my random thoughts on the game.  I will update when I can!  For now, I will describe my history with SWTOR.

I started playing SWTOR since closed beta in July 2011.  The hype for the game was tangible with the myriad of fan sites and podcasts already out back then!  Needless to say, getting into the closed beta was a wonderful opportunity for me.

End of Beta Party

End of Beta Party – Guess who the shirtless Chiss is!

At that time, I was a member of The Jedi Academy gaming community centered around Star Wars:  Jedi Outcast and Star Wars:  Jedi Academy video games.  The community is still around, but not as active anymore since the games are outdated.  As the name suggests, this community was a place conducive to teaching players how to play both games.  Members of the staff would hold classes teaching various lightsaber forms and game play modes.  The servers were filled with players waiting in line at the dueling mats!  I used to be an instructor for the dual sabers class and helped manage the community’s competitive Team Free For All (TFFA) team.

Jedi Academy Aurochs TFFA Team - I'm Lando!

Jedi Academy Aurochs TFFA Team – I’m Lando!

The Jedi Academy community was quite interested with SWTOR and expanding to it.  We set up two guilds, one for US and one for EU.  I was a co-lead for the US guild on Jedi Covenant (convenient server name!).  At launch in December 2011, a lot of community members started hopping into the game and playing through their class stories.  Everyone was playing at their own pace, but we all socialized while leveling.  Once most members hit the level cap on their first toon, they started to lose interest in the game or just didn’t have time for it.  Back then, the end game content was limited.  We organized Flashpoint runs and were able to field a team each week for them, but we never had enough activity for an op.  On the other hand, the EU guild was having better luck and a lot more participation.  I remember watching their live stream of Eternity Vault.  So proud of them!

As I foresaw and expected, the US guild was declining despite my efforts and the efforts of my officers.  I started having a lot of work trips mid way in 2012 and steadily lost interest in the game too.  After about a year of playing the game, I was disappointed with where the guild was and felt dragged down about what to do about it.  I decided to take a break from SWTOR and returned to playing various other games, such as Lord of the Rings Online (Rise of Rohan expansion) and various single player games gathering dust in my Steam library (who doesn’t have that problem?!).

I sporadically played SWTOR in 2013.  The US guild I was a member of was basically no more at that point.  When I heard about Galactic Starfighter and somehow got into the closed beta for that too, I returned to the game.  At that point, I decided to look for another guild to join.  In December 2013, I joined Pillars of Ashla on Jedi Covenant and am happily still there!  Pillars of Ashla does just about everything in the game but not in a hardcore manner which suits me rather well.  Unlike most guilds I’ve seen, Pillars has a well-structured charter outlining the rules and responsibilities for members and officers.  My first time raiding in SWTOR was with Pillars of Ashla!  The guild last year consistently made the Top 10 on the Guild Conquest Leaderboard.

Pillars of Ashla - 3rd place on the conquest board!

Pillars of Ashla – 3rd place on the conquest board!

I have not taken another large break from SWTOR after joining Pillars.  Unlike most people in the game, I used to focus on only one character, my Jedi Guardian, Yajard.  I’ve slowly been creating new characters to experience the other class stories.  I now have a Scoundrel, Sage, and Mercenary!  The momentum within SWTOR was picking up pace last year and hope it continues into this year.  More story content is something to look forward to, but I hope it doesn’t mean little to no updates for the rest of the game.  I’m very optimistic about SWTOR and intend to play the game for quite a while!

Now that my SWTOR life story is over…  a little more about this blog!  I will be writing anything that is in my thoughts regarding SWTOR.  I don’t intend to hit on all of the “hot topics” and summarize in-game updates.  I’ll pick a topic and just write about it.  I intend to keep future posts short and sweet, with a little humor mixed in.  I’m planning my second blog post to focus on the “dilemma” of who to guard in operations.  I’ll talk about the obvious game mechanics behind who you should choose and then my thought process on how I make it subjective too.

For now, signing off, with a picture of my Imperial Agent at the end of SWTOR beta.

See you soon!

See you soon!